Upcycle your clothes rack with #WayfairDIY
From old clothes rack to chic room divider with Wayfair Basics.
Whether you’re still sussing out the morning shower schedule, had your food ‘disappear’ from the fridge or drawn the short straw for cleaning the kitchen, living in shared accommodation or ‘co-living’, can be a pretty open and social experience. Sure enough, finding even just a little bit of privacy has become a thing of luxury... or has it?
Introducing our DIY room divider. An eco-friendly, money-saving and utterly stylish way to upcycle your old clothes horse and create your own slice of personal heaven right at home.
Multifunctional and totally unique, follow the steps below courtesy of German blogger, Luisa Ehlgötz (@schereleimpapier), and get your hands busy creating your very own room divider. For the purpose of this DIY, Luisa is using the 4 Fold Drying Rack from the Wayfair Basics range.
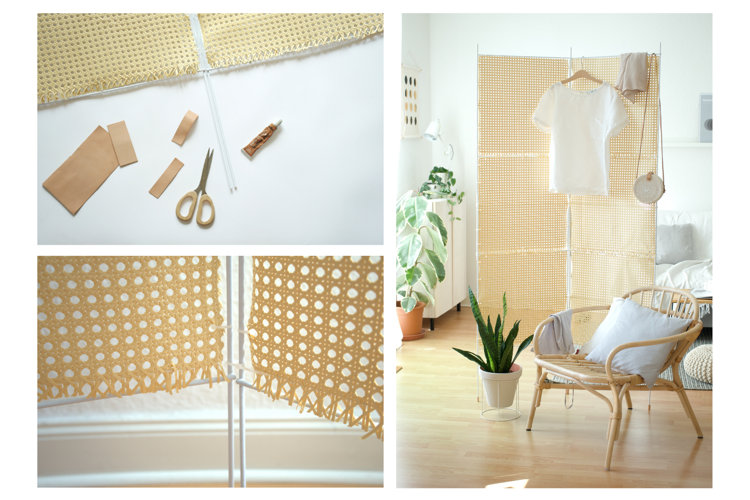
What You'll Need:
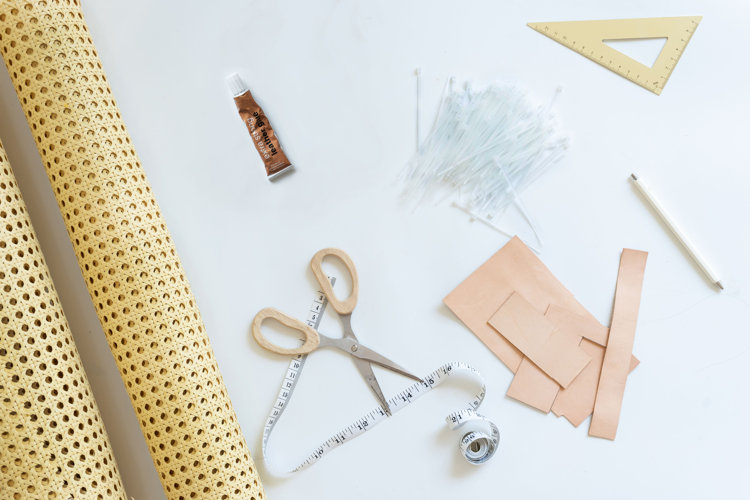
- Wayfair Basics 4 Fold Drying Rack / old clothes horse
- Reel of Viennese mesh (rattan)
- Natural leather
- Scissors
- Measuring tape or ruler
- Clear plastic cable ties
- Leather glue
How to Create a DIY Room Divider:
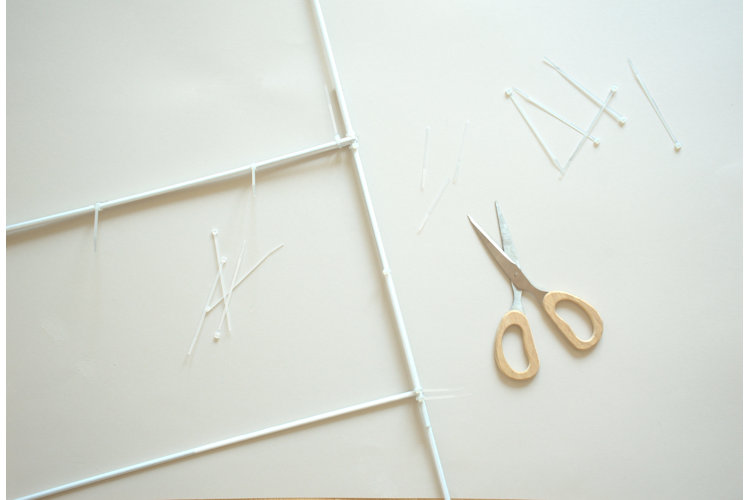
1) Prepare Clothes Horse / Drying Rack
- Disassemble your clothes horse into four parts
- Remove plastic tops and connectors (if applicable)
2) Connect Sections
- Create a partition with a height of approx 1.9m by attaching two parts of the clothes rack on top of one another and then using the clear plastic cable ties to secure
- First, place one end of each part on the other, making sure that they slightly overlap
- Fasten together with the cable ties and tighten securely
- Cut off any excess plastic with scissors
- Repeat for the remaining two parts until you have two full-sized partitions
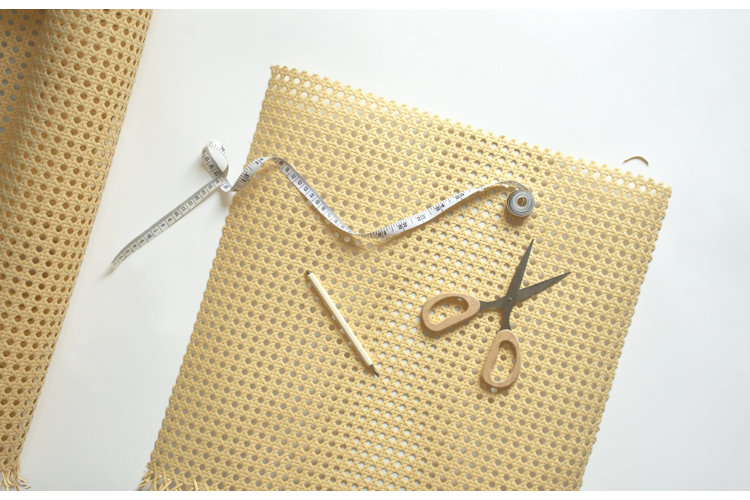
3) Prepare Viennese Mesh
- Each partition is made up of six sections and covered with three equal-sized, square pieces of Viennese mesh. One square of mesh is enough to cover two sections of the partition
- Using the measuring tape (or ruler), measure out each square of mesh to approx 48cm per side
- Cut out carefully with scissors
4) Attach Viennese Mesh
- Attach each individual square of mesh to both partitions (three per partition)
- Using the plastic cable ties, connect the mesh to the metal edges of the partition at several points to guarantee a secure hold
- Pass the cable ties through the holes within the mesh and then again around the metal. Tighten securely and cut off any excess plastic with scissors
- Tip! Don’t attach the mesh directly at the corners as the fabric is prone to wear and tear, especially in these areas. Try tying from the third or fourth hole (as seen in the image)
- Once all pieces are attached, both partitions of the room divider should be covered generously with the Viennese mesh
5) Bringing Everything Together
- Connect both partitions to make one complete room divider
- Take the remaining plastic cable ties and connect both partitions in the middle, top and bottom
6) Add Leather Foot Stoppers
- Cover the ‘feet’ of your room divider with leather tips aka foot stoppers
- Cut out three matching narrow strips of leather and wrap around each leg of the divider (three in total)
- Glue them together and hold until well stuck together
Additional Tips:
You can easily create a larger room divider by simply adding more partitions. Increase from two, four or even six partitions for more style and privacy.
DIY Room Divider: The Final Result
There you have it, a DIY room divider that’s not only stylish and functional but friendly on the environment and all yours.
And well, why not think outside the box? Our room divider not only creates some personal space, but also doubles up as a cute mood board, ready to hang and pin more interior inspiration and future DIY projects.
Enjoyed making our DIY room divider? Shop even more from our Wayfair Basics range, including a curated collection of quality bed frames, modern lighting and minimalist decor - all at affordable prices.
