Wake Up to Barista-Style Coffee Every Morning With a Milk Frother
Better latte than never.
Though they might seem like simple enough tools, milk frothers can truly add to your coffee mornings, as they're able to produce cold foam, whipped cream and even whipped coffee in minutes.
Our guide includes all you need to know about the types of milk frother, as well as 3 ways to use one for Barista-style coffee, every time.
Types of Milk Frothers
This might surprise you but there are actually a few different types of milk frothers to choose from. The first step in learning how to use a milk frother is figuring out which milk frother you'd like to use at home.
Automatic
An automatic milk frother does all of the work for you, acting almost like a mini blender. In place of blender blades, these electric, motor-operated devices have discs or paddles that rotate at high speeds to whip up their contents. Many automatic milk frothers have several speed settings and some can even heat up or cool down their contents, allowing them to produce cold whipped cream, hot whipped coffee and more. Opt for an automatic milk frother if you prioritise efficiency and would prefer a more hands-free frothing experience.
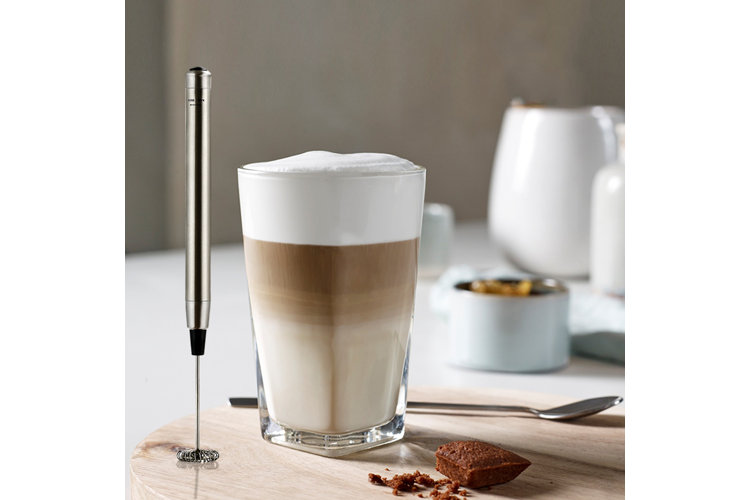
Handheld
Handheld milk frothers require more but minimal work to operate. These battery-powered devices have a handle and a whisk head, which rotates rapidly to whip milk or cream with ease. These devices are small, easy to use and easy to store, making them some of the best milk frothers for frequent, casual use. Although they may struggle to whip large quantities of liquid, they're optimal for single or double servings of foam for cappuccinos.
Tip: An appropriate vessel is a must-have to produce the perfect milk foam with a handheld frother. Milk frother pitchers are designed to minimise your time and effort expenditures while maximising the amount of thick foam you can produce.
Manual
Manual milk frothers are not electric or battery operated; instead, they're powered completely by your skillful hands. These milk frothers require the most work out of the three types of milk frothers, but even then, the whisk work required is minimal. Manual milk frothers include a glass or plastic pitcher and a plunger apparatus that includes a snug lid. The entire device resembles a French press in look and function – the plunger moves up and down inside the pitcher as you pull and push the plunger handle. These frothers can handle more liquid than handheld milk frothers and will have your fresh foam or cream ready in under a minute. Almost every part of a manual milk frother can go in the dishwasher for easy cleanup.
Tip: With Autumn fast approaching, why not make the most of your homemade pumpkin spiced lattes with a milk frother and your own foamy milk?
How to Use a Milk Frother
Now that you're clued up on the different types of milk frothers, we take you step-by-step into how to use each of them for perfectly foamy milk.
Using an Automatic Milk Frother
Step 1: Place the pitcher on a flat, dry surface and assemble
You may need to take off the pitcher lid and insert the appropriate frothing disc for the task you'd like to perform; some automatic milk frothers have discs specialised for lattes, cappuccinos, flat whites or other drinks. Insert the frothing disc according to the manufacturer's instructions. Other automatic milk frothers require no assembly.
Step 2: With the lid off, pour in the amount of liquid you'd like to foam
Many automatic milk frothers have markings that will show you how much cold (or hot) milk you should add to produce a certain number of servings of foam. Do not fill the pitcher over the markings – you could damage the device or make a mess.
Step 3: If necessary, place the pitcher on the base
This step is only necessary if your milk frother's pitcher and base are two separate parts; if your automatic milk frother is only one unit, skip this step.
Step 4: Plug the milk frother in
Step 5: Apply your desired settings and/or power the device on
Your automatic milk frother should have buttons on it that turn it on and off and/or control its speed, its foam settings, its temperature, and more. Press the buttons for your desired results.
Step 6: Time to serve
Most automatic milk frothers will automatically shut off once the frothing is done. If you used your device's heating component, wait 2–3 minutes for the device to cool down before you touch it. To serve, simply remove the pitcher from the base (if applicable), remove the lid and pour.
Using a Handheld Milk Frother
Step 1: Fill a vessel with the amount of liquid you would like to foam
Do not fill the vessel more than one-third full, or your milk frother will struggle to foam the liquid efficiently.
Step 2: Insert the whisk head just beneath the surface of the liquid
Hold the frother vertically in your dominant hand.
Step 3: Power on the device and gently move it up and down in the liquid
Be careful not to let it touch the bottom or sides of the vessel.
Step 4: Once the liquid is frothed to your liking, power off the device and remove it
Try not to remove the device from the liquid before powering it off; it will release a spray of liquid and cause quite a mess. Now you can serve your milk foam.
Using a Manual Milk Frother
Step 1: Place the pitcher on a flat surface and remove the plunger apparatus
Step 2: Pour in the amount of liquid you'd like to foam
Your manual milk frother may have markings or measurements on it to indicate how much hot or cold milk you should add. Otherwise, don't fill the pitcher more than one-third full.
Step 3: Reassemble the milk frother with the plunger apparatus
Make sure the lid is on snugly so that no liquid particles escape while you are frothing.
Step 4: Pump the plunger up and down vigorously for about 30 seconds
Hold the plunger handle securely in your dominant hand and move it up and down rapidly. The faster you move, the faster your liquid will foam. You can check on your foam throughout this process to ensure it is the correct consistency; for thicker foam, simply pump the plunger for longer.
Step 5: Remove the plunger apparatus and serve
Remove the lid and plunger gently to avoid launching bits of foam upward.
Tip: Don't let your coffee ventures stop there! Check out our additional guides, Fulfil Your Mornings With a French Press Coffee and How to Properly Clean a Coffee Maker.
