From Bean to Cup - How to Make a Perfect Cup of Coffee
From bean to cup—explore top tricks for creating your own perfect cup of coffee!
Read below to find expert advice on choosing the right roast type, preparation methods, and milk frothing techniques as well as insider tips on how to create your perfect cup of coffee at home.
There are few things better than enjoying that first sip of coffee in the morning. Many of us rely on our local coffee shops for the best cup of Joe, but what if you could create the perfect brew in the comfort of your own home?
We’ve asked baristas all over the world to share their tricks for concocting the number one at-home cup of coffee and how you can do it yourself! Check out these top tips to start brewing with the best.
Don't Know Beans About Beans?
The most coveted cup is made of only three things, the best beans, water and your preferred method of preparation. Finding your favourite beans can seem daunting, but there’s fun to be found in experimenting with different flavours and roasts to find the tastes you like the most! If you’re unsure of where to begin, your local barista or roastery can also help you decide or answer any coffee questions you may have.
We share our overview on the 4 main roast types ; each process provides a different colour, flavour and aroma to the bean:
Light Roasts - as the name suggests, this bean is light brown in colour as it absorbs heat for the shortest amount of time and the taste is earthy, grainy and acidic. It may surprise you to hear that light roasts retain most of the caffeine from the coffee bean so will give you that desired morning burst of energy!
Medium Roasts - they are medium brown in colour with more flavour, depth and balance than light roasts, and could also be described as spicy. This bean contains less caffeine content then light roasts but more than dark.
Medium-Dark Roast - these roasts are richer and darker in colour and the heating process causes some oil to appear on the surface of the beans. The taste is bittersweet and more intense with a pronounced, roasted aroma.
Dark Roasts - they have more oil on the surface than medium-dark roasts and are dark brown, verging on black in colour. These roasts have been heated at the highest temperature to the end of the second crack or beyond and the flavour is bitter & smoky. Dark roasts have the least amount of caffeine of all the beans because of the long roasting process. These types of roasts are most commonly used for espresso thanks to their intense, dark flavour.
If you’re unsure of where to begin, your local barista or roastery can also help you decide or answer any coffee questions you may have. It is useful to know the type of roast to make your perfect brew, but in reality many other factors determine the taste, including: country of origin, age of the coffee, the grind and processing method.
Jamie O’Neill, from Upside Coffee in Dublin weighed in on his favourite beans:
"This depends on my mood, and the time of year. When I want to enjoy an easy-drinking, smooth coffee I would go for a good quality Brazil or Honduran. As the genetic birthplace of Arabica Coffee, Ethiopia produces an astounding variety of flavour characteristics - from tropical fruit to Earl Grey tea!"
"
Keep in mind that you can always make the most of store-bought beans as long as they’re whole and not pre-ground . When you grind your own beans shortly before brewing, it’ll result in a much more flavourful experience.
"Tip: Very important is a fresh grind, so have a little manual coffee grinder and you'll taste the difference."
*- Mascha Roos from *Pola Café in Berlin**
If you don’t have a grinder of your own, we’d recommend The Origins Manual Coffee Grinder for the perfect manual grind every time.
Once you’ve got your beans, make sure to keep them fresh! Coffee beans are technically a fruit, which means they won’t last forever—make sure to enjoy them within 10 days of roasting date (make sure to check your bags for this date before buying!).
Secure Your Setup
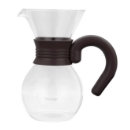
All of the baristas we spoke to agree that a little investment in the right equipment makes all the difference for your caffeine routine. You can always splurge for a home espresso machine if you prefer, but it’s not a must, as most of the experts we asked recommend a quality pour-over apparatus for maximum control over flavour and water-to-coffee ratio.
It is also important to get the perfect sized grind dependent on the equipment you’re using as this will affect both the flavour and taste. Two great electric coffee grinders that will allow you to achieve the consistency you require are the High Power Electric Blade Coffee Grinder (£16.99) or The DeLonghi Electric Coffee Grinder (£52.99).
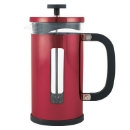
French Press or Cold Brew - requires a coarse, even grind as this method takes a long time to brew. The beans should look chunky in consistency, if they are too fine, the coffee will taste bitter but if they’re too large, your coffee will be weak and watery. You can achieve this grind with
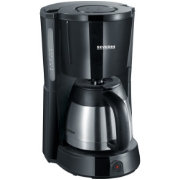
Machine Drip - this preparation method requires a medium grind (like sea salt). It is typically made using a filter so you don’t want the grinds to be too fine or else they will clog it. However, if they’re too large no flavour will be absorbed resulting in a tasteless cup of coffee.
Espresso Maker - requires a fine grind (like sugar) because of the short time the coffee grind comes in contact with water. Pressure builds up which forces the water through the fine grinds. If the grind was coarse, the water wouldn’t be able to extract the flavour from the coffee beans. Espresso needs the grind to be just right and if it’s slightly finer or coarser, it can significantly affect the taste of the cup.
Make Your Measurements
Don’t forget: Creating your ideal morning cup is all about your personal preference. Measuring your grounds and adding the right amount of water are where you can find your perfect balance to tailor your brew to your unique taste! Start with 10.5g of grounds per cup , then adjust the amount based on your strength preference.
Hugh Duffie from Sandows Cold Brew in London had this to say when asked what makes the difference between good and great coffee:
"Consistency! Measuring everything out carefully (needn't take long!) to ensure it's neither too strong or too weak."
"
To ensure this kind of consistency, we suggest the purchase of a kitchen scale (if you don’t have one already) which will help you to find your ideal amount of grounds per cup. May we suggest the Morphy Richards 3-in-1 Digital Jug? You will be able to weigh and measure at the same time!
Tip: While you’re experimenting, jot down the amounts of grounds and water you used. If you enjoyed it, you’ll know exactly how much to use the next time around.
Just Add Water
It’s time to talk about the final ingredient for your perfect brew… water! Watching the amount you use will mean the difference between sipping sludge and enjoying a perfectly balanced mix of flavours. To start, try 180ml of water with your 10.5g of grounds and scale accordingly. If you like things on the stronger side, feel free to hold some of that water.
The quality of your water also matters! Nothing will spoil a great cup of coffee more than the off flavours of chemicals. Andreas from The Barn Roastery in Berlin helps explain his perfect home coffee setup:
"My ideal setup is with a scale, thermometer, and filtered water. Water makes a big difference in taste and as long as I am measuring coffee weight and water amounts, I can brew tasty coffees."
"
No matter which brewing method you use, you’ll want to make sure to heat your water between 90 - 96 °C before adding it to your grounds. The heat will help release the coffee’s flavours, but don’t let your water get too hot to avoid any burnt flavours.
Now that we’ve got everything in place, it’s time to get your brew on! Add your water to the coffee grounds slowly, just covering them at first in order to let things expand to maximise flavour.
Froth It Up!
You don’t have to limit yourself to simple black coffee either. Experiment with the milk to coffee ratio and see if you’re a latte, cappuccino or flat white fan. You can recreate that frothy mouthfeel at home without a fancy professional milk steamer. Just grab a saucepan, heat up a desired amount of milk (but don’t bring it to a boil or it’ll curdle) and pick one of our recommended methods from the list below:
https://www.wayfair.co.uk/kitchenware-tableware/pdp/severin-milk-frother-srvn1054.html
Electric Frothing Wand - the most popular option for at-home baristas. Just immerse the tip in milk and move it around until you achieved the desired foam consistency.
Manual Milk Frother - fill it up with warm milk and move the pump up and down vigorously for a few seconds. Pretty straightforward and counts as morning workout (at least we believe it does). If you don’t have a manual milk frother you can also use a cafetiere. Repeat the same steps as described above and you should get a pretty decent foam.
https://www.wayfair.co.uk/kitchenware-tableware/pdp/tower-5-speed-hand-mixer-toe1245.html
Electric Mixer - simply whisk the milk the same way you would when making whipped cream. You probably have one lying around your kitchen so give it a try.
https://www.wayfair.co.uk/kitchenware-tableware/pdp/philips-viva-2-l-blender-xzy2012.html
Blender - blend the warm milk on medium speed until you’ve reached the desired frothiness. It’s a hassle free method that produces great froth and doesn’t require buying a single-purpose tool. A hand blender will work too but might be a little more messy.
https://www.wayfair.co.uk/kitchenware-tableware/pdp/symple-stuff-whisk-cbg2967.html
Whisk - a viable option if you’re willing to put some elbow grease into your morning latte. Just vigorously whisk the milk back-and-forth. It might take a little longer than the other options and the foam might not be as thick.
https://www.wayfair.co.uk/kitchenware-tableware/pdp/belfry-kitchen-storage-jar-ccop3877.html
Jar - this method requires no extra equipment. Just grab a clean jar, fill it up with warm milk and shake it for a while. Make sure not to burn yourself as the glass will get hot really fast. This option will work just fine, if you’re simply experimenting with making coffee at home.
Steep, Sip & Enjoy!
Depending on the brewing method you’ve chosen, you’ll need to let your coffee steep (just like good tea!) in order to make sure you can enjoy all your beans have to offer! The ideal time for most brewing methods is 3-5 minutes . Keep an eye on your cup and test different steeping times to find your perfect balance for future brews.
It’s finally time to grab your favourite cup or mug and taste your coffee creation! Hopefully these helpful tips will allow you to find a great home brew that is unique to you!
Thanks for reading… it’s bean fun!
