The Experts' Guide to Hanging Your Own Wallpaper
Your step-by-step guide to wallpapering walls.
With an incredible variety of trendy colours and patterns to choose from, wallpaper can be so much more than that peeling floral print in your grandparents' dining room. Rather than spending your afternoon covering your walls with coats of paint, consider layering them with stylish wallpaper – once you know how to hang wallpaper, wallpapering takes around the same amount of time as painting. Use this guide as the ultimate wallpaper installation resource – below, we go over some wallpapering terminology, the tools for wallpapering, and how to install wallpaper from beginning to end.
In This Guide
Wallpapering Terms to Know
How to Prepare Your Walls for Wallpapering
How to Hang Wallpaper
How to Hang Wallpaper at or Around Corners
How to Hang Wallpaper Around Obstacles
Wallpapering Terms to Know
Plumb: straight up and down. This is the vertical equivalent of the term "level".
Booking: the process by which you 'activate' the paste on pre-pasted wallpaper by wetting it and then gently folding it paste-side in as you go without creasing the folds. Folding the adhesive sides in keeps them from being exposed to the air for too long – the adhesive is allowed to get tacky, but not dry. You should soak and book according to your wallpaper manufacturer's instructions.
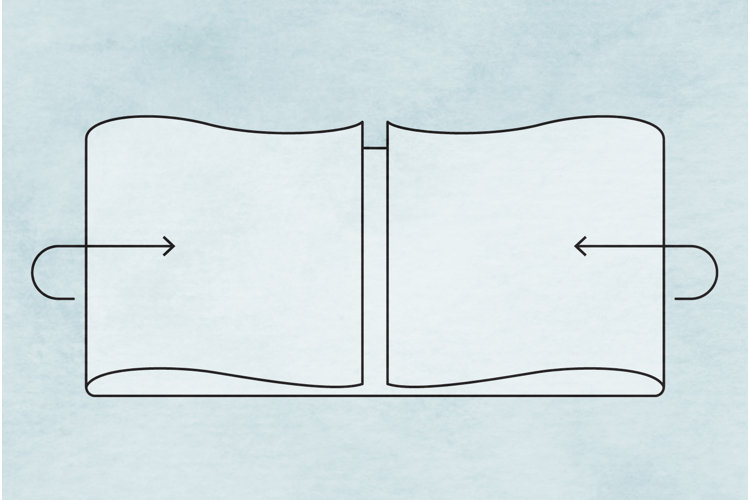
Butting: applying strips of wallpaper closely beside each other without overlapping them to create a subtle, attractive seam. Properly primed walls and booked wallpaper prevents wallpaper shrinkage, so overlapping is not necessary.
How to Prepare Your Walls for Wallpapering
It's important to ensure that your walls are in good condition before you start your wallpaper installation so that your application looks great and lasts a long time.
If you're wondering whether you can wallpaper over wallpaper, we've got a How to Wallpaper Over Wallpaper guide all about that – take a look before you begin.
What You'll Need
- Spackle
- Spackle knife
- Sandpaper
- Multi-surface soap
- Bucket of water
- Sponge or rag
- Wallpaper primer
- Sponge brush for primer
Step 1: Remove all decor and wall plates, and move furniture out of the way
You'll want to get rid of anything that might get in the way of clean, easy wallpapering.
Step 2: Repair any damage
If your walls are dented, cracked, scratched or otherwise damaged, you'll need to repair them with spackle. Apply using a spackle knife and make sure it dries completely before you move on.
Step 3: Smooth the walls with sandpaper
In order for wallpaper to apply cleanly with a smooth finish, you'll need to lightly sand away any texture. If you applied spackle, make sure to sand away any excess.
Step 4: Wash the walls and let them dry
Using water, multipurpose soap and a sponge or rag, give your walls a good cleaning to get rid of any dirt or oils that may have collected. Allow for them to dry completely.
Step 5: Prime the walls
Wallpaper primer is a must if you want to protect your walls. It enables wallpaper to apply securely without over-adhering to the surface of your walls, allowing easy, damage-free removal later on. Primer also prevents existing wall colour from showing through the wallpaper. Most often, wallpaper primer is acrylic-based, but you should check the manufacturer's instructions to ensure you choose the right primer for your walls. To prime your walls, just apply an even coat with a sponge brush and let it dry completely.
How to Hang Wallpaper
What You'll Need
For pre-pasted wallpaper:
- Sponge
- Bucket of water
For non-pasted wallpaper: - Wallpaper paste
- Paint roller
Tools for wallpapering: - Measuring tape
- Level
- Straightedge
- Plumb bob and nail (optional)
- Pencil
- Wallpaper
- Long table (for easier cutting and pasting)
- Scissors
- Ladder
- Wide putty knife
- Utility knife
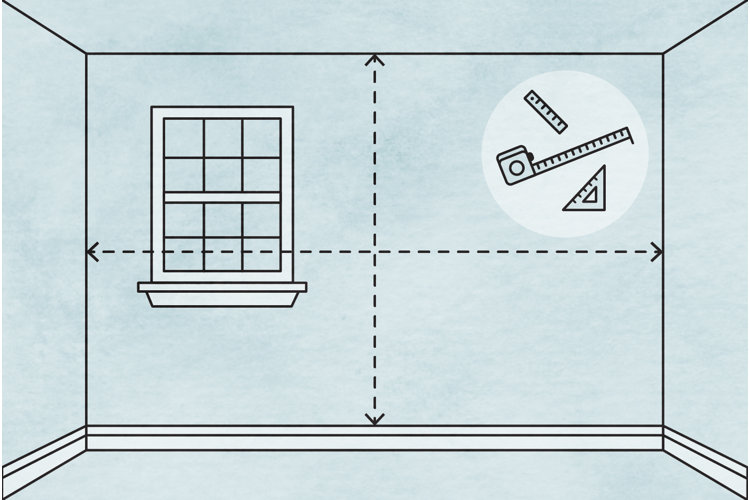
Step 1: Measure your walls and draw a central plumb line
Using a level and measuring tape, measure and record the width and height of each wall. Find the midpoint of the wall and draw a plumb line from the floor to the ceiling. You can also hang a plumb bob tool from a nail hammered at the centre of the wall to draw your plumb line, but you'll need to repair any holes made by the nail before you start. If your wall has features like windows, doors or even mantels, it's a good idea to draw your plumb line in the centre of the widest open space on your wall.
Step 2: Calculate how many strips of wallpaper you'll need to paper your wall
Divide the total width of your wall by the width of your wallpaper roll. You may end up with a fraction, but for now, just worry about the whole number of sheets you'll need.
Step 3: Measure your first strip of wallpaper
Lay your wallpaper roll colour-side down on your table. If your wallpaper is patterned, decide where you'd like the pattern to start (at your ceiling) and mark it on the back using a straightedge. Making sure to leave a little excess above the start of your wallpaper's pattern (we recommend 4"), measure a length of wallpaper that is the height of your wall plus the 4". Mark it using a straightedge and cut along that mark. Note which end of the paper is the top and the bottom on the back so you can keep track later.
Step 4: Cut all of your whole wallpaper strips
Using your first strip as a guide, measure and cut all of your whole strips of wallpaper to that same length. If your wallpaper has a repeating pattern, lay your first strip beside the roll and line the pattern up before you measure and cut. Make sure you are allowing for excess paper at the top and bottom of each strip.
Step 5: Prepare your wallpaper
If your wallpaper is pre-pasted, wet it according to the manufacturer's instructions. Book the paper as you move along the strip. Let it sit booked for the amount of time indicated in the instructions to allow the adhesive to get sticky.
If your wallpaper is not pre-pasted, you'll need to apply an even layer of paste using a high-quality roller. Book your wallpaper if the instructions for the paste indicate you must.
If you purchased peel-and-stick paper, you won't need to prepare your paper before you start.
Step 6: Hang your first strip of wallpaper
Line one side of your first strip of wallpaper up against the plumb line and, leaving some excess against the ceiling, press your paper gently into the seam where your wall and ceiling meet using your putty knife. If your wallpaper is patterned, line up the mark you made earlier at the start of the pattern against the seam. Making sure your wallpaper is plumb along the way, slowly move down, gently smoothing the paper from the inside out using your putty knife. Smoothing from the centre of the paper to the edges ensures that you're releasing bubbles and wrinkles. If you notice any bubbling, gently lift the paper from the wall and smooth it down again to remove them. If you're using peel-and-stick paper, pull down the backing as you move down.
Step 7: Trim the excess
Once you reach the bottom, crease your paper against the wall skirting and against the ceiling using your putty knife. You can either trim the excess off each end using your utility knife or pull it back gently and cut along the crease using your scissors.
Step 8: Wipe off the excess adhesive
Give the entire sheet another once-over with your putty knife to ensure all the edges are smoothed down, then go over it with a damp sponge to remove any excess adhesive.
Step 9: Repeat the process for all your wallpaper strips
Lining them up tightly against the adjacent strip (by pattern if applicable), repeat the above process for each consecutive strip of paper. Your seams should be butted, not overlapped.
Keep reading for instructions on how to wallpaper around corners.
How to Hang Wallpaper at or Around Corners
Step 1: Measure the width of the open space in multiple places
Measure the distance from the edge of the last strip of paper to the corner in multiple places – sometimes rooms' corners aren't perfectly vertical, so multiple measurements will ensure you have enough paper to round the corner in all places. Add 1/2" to that measurement for excess.
Step 2: Cut a strip of wallpaper to the right width and height
Making sure to line up the pattern before you cut, cut a strip of wallpaper to the width you measured. Cut it lengthwise according to the height measurement you've been using. If your paper is patterned, make sure that you are lining up the pattern before you make any cuts.
Step 3: Hang while applying pressure against the corner
Apply paper according to the above instructions while ensuring you smooth the 1/2" of excess along the adjacent wall. If you are only wallpapering one wall at the corner, do not smooth the excess; instead, trim it. Trim and clean the excess at the top and bottom as normal, but be careful when cutting at the corner seam – a utility knife is a better tool than scissors for this task.
Step 4: On the next wall, overlap the excess and apply flush against the corner seam
Overlapping is encouraged when you start applying wallpaper from the corner of the next wall. As always, ensure your overlapped pattern lines up with the previous strip before you cut.
Tip: These steps apply to both external corners and internal corners.
How to Hang Wallpaper Around Obstacles
Whenever you reach an obstacle, the rule of thumb is to wallpaper as normal and trim around obstacles as you go.
Around windows or door frames: Moving down from the ceiling as normal, crease the wallpaper against the edges of the window or door frame as you meet them and trim along the creases after you've smoothed down the paper. If you're intercepting the corner of a window or door, trim where the wallpaper meets the top of the frame and then smooth the long side all the way down to ensure a clean, proper finish. Then, trim the excess from the side crease.
Around wall plates/holes: Wallpaper over the wall plates or holes as normal. Once your wallpaper is applied, feel for the corners of the holes or plates and use your pencil to make lines from each corner to the opposite corner. You should end up with an X marking the location of the plate or hole. Now, using your scissors, cut along those lines to create four triangular flaps. Gently crease the edges of your paper against the plate or the edges of the hole and then trim the flaps against those creases.
How to Remove Wallpaper
For an overview of how to remove wallpaper and wallpaper glue, check out our The Expert Guide to Removing Wallpaper and Wallpaper Glue guide.
Tip: Find even more ideas and inspiration with:
- 5 Wallpaper Ideas That'll Help Elevate Your Bedroom
- Experts Tips for Buying and Hanging Wallpaper
- 10 Modern Wallpaper Ideas to Uplift Your Home
