Creating a Customised Children's Playhouse
DIY fun that the whole family can enjoy.
Children have an amazing ability to create magical worlds in ordinary places. In our garden, an old tree stump becomes a castle, a secret hideout – or a fairy palace. But I've always wanted to give our boys a proper little den – a place where they can let their imagination run wild, whatever the weather, year after year. This tutorial is about how you can take an off-the-shelf, flat-pack playhouse and work together as a family to turn it into something really special.
You will need:
A flat-pack children's building, like the Rowlinson Little Lodge Playhouse
Suitable tools – such as an electric screwdriver, drill, hammer, and spirit level
A base for the building – we used lengths of 50x50mm fence post. Remember you'll need a decent saw to cut them to size
Exterior timber paint in two contrasting colours – we used Cuprinol Garden Shades in Forget-Me-Not and Pale Jasmine
Paintbrushes – one large and one small
Cotton rugs, cushions and other cosy accessories
Small cup hooks
Step 1
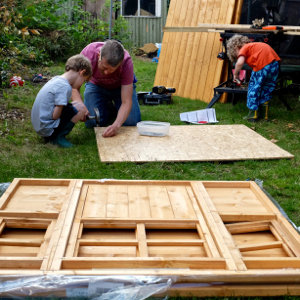
Your starting point is a small wooden children's playhouse – in kit form, ready for assembly. Put it up according to the instructions. It's mostly a one-person job, but you might find it useful to have an extra pair of hands to hold things in position. Remember to think about where your shed will go and what it will sit on. Our kit's instructions suggested using lengths of 50x50mm pressure-treated timber – in other words, fence posts. That's exactly what we did.
- When you use a screw, remember to drill a pilot hole first – particularly near the end of a piece of timber. If you don't, the wood might split.
Step 2
Now it's time to get creative with your paint. We love the seaside, and decided to go for a beach hut look – most of the shed painted in a soft blue, with details picked out in white. Be generous with the paint, as the dry wood will soak up a lot of liquid. Follow the natural grain with nice even strokes for a smooth effect. Two coats of paint give a good finish.
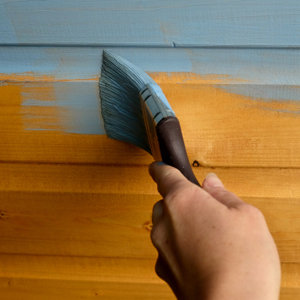
- Painting a shed can be a great opportunity to perfect DIY techniques like cutting in. Get it right on the playhouse, then put it into practice when you decorate your bedroom.
Step 3
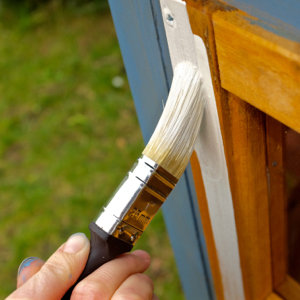
Once you've painted the large sections, it's time to move on to the fiddly details – like the window frames and door. You'll need your small brush and a steady hand. The windows are the most difficult part. If you're less confident about your cutting-in technique, use masking tape or paint the frames before putting the panes in place.
Step 4
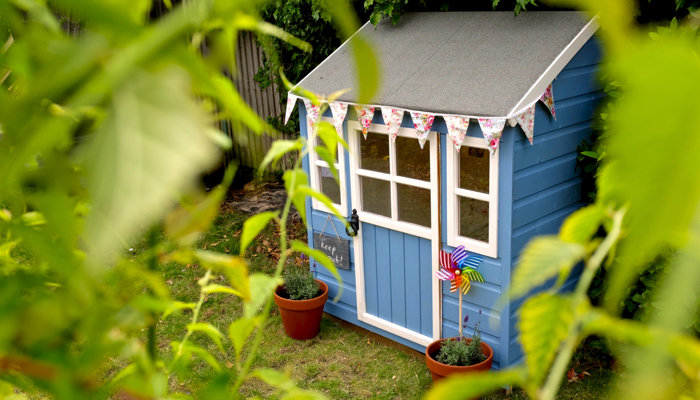
Outside, you can add character with pretty bunting, pot plants and a little chalkboard. This is your chance to get really imaginative. Fancy a woodland hideaway? Throw a camouflage net over the roof and hunker down with your binoculars. Or how about opening a little village shop? Arrange some wooden crates and get creative with a till and some plastic food. The possibilities are endless!
- If you want to fix something heavy to the playhouse – like a shelf – then don't rely on the thin wooden wall. Use the more solid structural bits of the building to take the weight, or screw right through the wall and into an extra block of wood on the other side.
Step 5
Inside the playhouse, we decided to use the remaining white paint on the walls for a rustic, seaside feel. A single coat gives a whitewashed look, maximising light and letting the natural grain of the wood show through in a lovely faded way.
Step 6
We covered the floor with simple cotton rugs and created a cosy reading corner with some cushions. Pretty postcards and a glowing battery-powered lantern complete the look. These few simple touches have made it such a warm, welcoming space – part beach hut, part log cabin!
- Want to see more? See a video of the making of our playhouse over on YouTube or read my blog post about it here!
