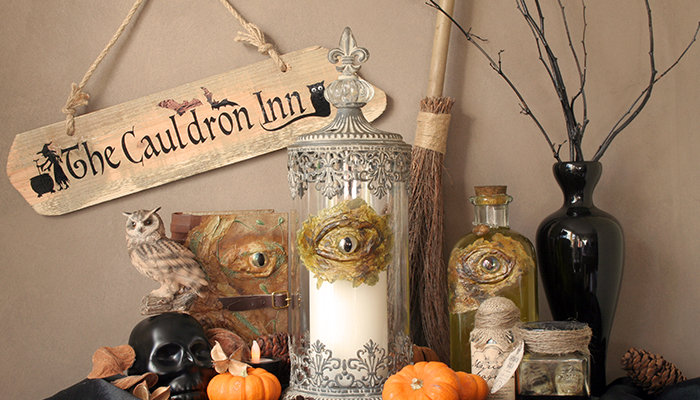
DIY Halloween Dragon's Eye Decoration
Watch out—this DIY dragon's eye is watching you.
I love Halloween, or Samhain as it is to me, and each October I can't wait to decorate the house in celebration of this ancient Gaelic festival.
This year, I've been crafting up a storm and one of my favourite creations has been a simple dragon's eye. It can be used to decorate a variety of surfaces, including potion bottles and maché forms (think DIY spell books!).
When I spotted the gothic-looking Mindy Brownes Glass Canister Hurricane on Wayfair.co.uk, I just knew it'd be perfect for a little Dragon's Eye treatment.
© The World of Suzy Homemaker
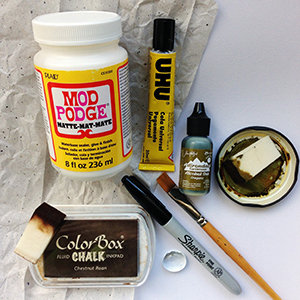
Supplies:
- A clear, flat-backed glass floristry pebble. If you don't have any glass pebbles, you can print out an eye image and use Glossy Accents to give it some dimension
- Black Sharpie or other permanent marker
- Superglue
- Tissue paper— I use the sort that's used to wrap shop-bought items
- Mod Podge and paintbrush
- Paint of your choice and brushes/sponges. Use any medium you have to hand, e.g. acrylic or chalk paints, or even emulsion. I like to sponge on alcohol ink and "Oregano" is the perfect colour for this project. Alcohol inks can be quite heady, so be sure to work in a ventilated space.
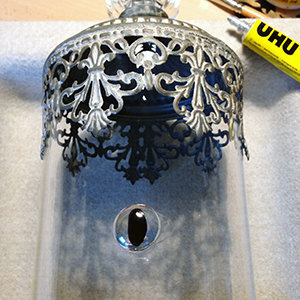
Step One:
Using your marker, draw an oval shape onto the glass pebble to create a pupil. If you find the marker doesn't quite make the eye black enough, go over the pupil with a little black nail varnish. Perfect!
When working on a round surface like the Mindy Brownes Canister, rest your piece on something to stop it rolling. Make sure the surface of the piece you are decorating is clean and dry. Decide where you want your eye to be. Remember you'll need enough room for the eye and the "dragon skin" around it.
Position the pupil vertically and glue the pebble onto your surface with superglue.
Set aside until the pupil is fixed in place.
© The World of Suzy Homemaker
- When working on glass, your pebble may "slide" a little while it's drying. Just hold it in position for a few moments until it adheres and don't worry; you'll be covering any visible glue in the next step.
© The World of Suzy Homemaker
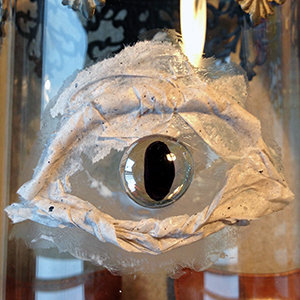
Step Two:
Once glued, you're ready to create the dragon's eye. To begin, roll and twist a torn strip of tissue paper. Brush some Mod Podge above the pupil and glue the strip to create a raised eye-shaped curve.
Build the eye and dragon's skin by randomly using Mod Podge to glue small pieces of torn tissue paper over the curve and all around the pupil.
Gluing under and on top of the tissue paper will ensure the pieces stick well and will help "sculpt" the eye. Create one or more curves under the eye by rolling another strip or two and gluing in place.
Glue tissue paper right up to and around your pebble, so it looks like the eye is peeking through the skin.
Step Three:
Continue tearing, sticking, and layering, until you create your desired eye shape. Take your time; it's therapeutic!
The great thing about using tissue paper is it's so light; you can fold, mold, and brush it into the shape you want. Also, when you come to paint your eye, the different layers will help create the look of textured skin.
This is one of those crafts where you can't go wrong. If you put tissue paper in the wrong place or it goes too far onto the eye, simply re-position while it's still wet.
© The World of Suzy Homemaker
Step Four:
If you want more definition, add another twist or scrunch some small pieces of tissue paper. Folds are your friend; use them to create texture and "wrinkles" in the "skin".
When you're happy with the final shape, set aside to dry. When it's dry, it's time to paint your eye. If using alcohol ink, squeeze a little ink into an old jar lid and sponge onto your work. Tip: Alcohol ink dries quickly, but you can revive it by adding a few drops of Surgical Spirit.
If you can't quite get into some of the nooks and crannies with a sponge, use a cotton bud or paintbrush. Remember, when working with ink, you can't clean your brushes in water, so it's best to use a dedicated brush or sponge for each colour.
Step Five:
When you're happy with the colour, sit back and admire your handiwork.
Pop a candle into your hurricane and as night falls, watch as your dragon awakes and casts a spooky eye upon your Halloween-themed decorations.
© The World of Suzy Homemaker
