How to Tile a Shower Wall Like a Pro
Your step-by-step guide.
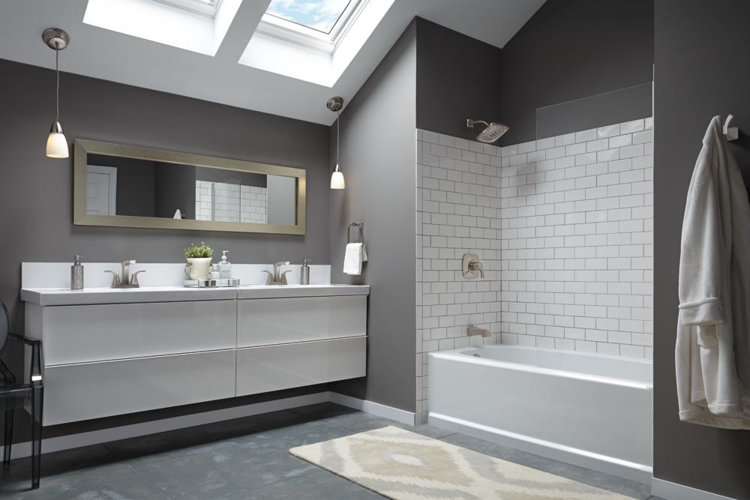
Thinking of renovating your bathroom? One way to instantly update your space is to replace your current shower set-up with a modern, custom-tiled wall - a project that is actually a lot easier than you might think. I this guide, you'll find step-by-step instructions to tiling your shower wall.
Difficulty Level
4/5
Estimated Time Taken
7-10 days
Materials You'll Need:
- 2 x 40kg concrete mix bags
- Tarpaper
- Shower pan liner
- Cement boards, like HardieBacker
- Cement board screws
- 5 x 20kg thinset mortar bags
- 2 gallons waterproofing barrier
- Tile
- Tile trim
- 5 x 5kg unsanded grout bags
- Grout haze remover
- 2 x 0.5 litre tile sealer
- 20-grit concrete rub brick
Tools You'll Need:
- Hammer
- Hammer drill
- Notched trowel
- Utility knife
- Staple gun
- Tile nippers
- Diamond blade wet saw
- Rubber float
- Socket wrench
- 60cm level
- Measuring tape
- Knee pads
- Small shovel
- 2-3 x 2 litre buckets
- Gloves
- 2-3 sponges
- Fibreglass tape
- Duct tape
- Wooden block
- Microfiber cloths
- Safety goggles and respirator mask
- Silicone caulk and caulk gun
- Foam brush, paint roller, and covers
Step 1: Calculate the Total Square Meters
Materials & Tools: Measuring Tape
To determine the amount of wall tile you need, find the total square meters of the area. To do this, multiply the length by the width of each surface that will be tiled. Then, add all the surfaces together to get the total square meters of your shower.
Don't forget to take into account the ceiling, floor, shower curb, outside shower border, any shower nooks you plan to add and a shower bench if applicable.
Add an extra 10-15 percent to your total to compensate for tile breakage, mistakes, and other variances.
Step 2: Order Tile Samples
Materials & Tools: Tile Samples
Now that you know the square metres of your shower walls, it's time to figure out your tile preferences. Don't get frustrated if this step takes longer than you expected. Do your research, read reviews, and search the Internet for real-life examples of the wall tile in use. The following are the five most common tile options:
- Ceramic: Typically one of the least expensive options, ceramic tile is perfect for damp environments like the bathroom or kitchen. Just make sure that you do a slip test on a sample if you're opting for a glossy option.
Glass: Generally slightly more expensive than ceramic options, glass tile is a popular choice for backsplashes, but is usually too slippery to install on the floor.
Porcelain: Porcelain is one of the more expensive options, but thanks to its dense and non-porous surface, it absorbs very little water, making it perfect to use in the bathroom.
Natural Stone: Natural stone has a very porous surface and will require regular resealing in order to last.
Marble: Marble wall tiles are one of the more expensive natural stone options. But while there's no denying the luxury factor, marble is a very high-maintenance surface, as it's more prone to cracking, staining and scratches.
By sampling before buying, you can double check the colour and sizing, soak-test the tiles for quality control, and get a good idea of whether the tile fits the style of the bathroom. Once you've narrowed down your choices and are ready to place your order, don't worry about trying to figure out just how many tiles are in each carton or how many cartons you'll need. On Wayfair.co.uk, you'll find a helpful tile calculation feature on all flooring product pages where you input your square meters, which calculates the number of cartons you'll need for your project.
Step 3: Buy Grout
Materials & Tools: Grout Samples & Grout
If you want to minimise mistakes like uneven grout lines and other inconsistencies, choose grout in a similar colour to your tiles. Also consider the maintenance factor - if you don't like cleaning grout, you may want to opt for a darker option. Keep in mind that a high-contrast grout colour will highlight any mistakes.
There's also the question of sanded versus unsanded grout. If your joints are 0.3cm or smaller, use unsanded grout. If your joints are more than 0.3cm, or if you're grouting the floor, then use sanded grout.
Step 4: Tarpaper the Shower Floor
Materials & Tools: Tarpaper, Measuring Tape, Level, Pencil, Utility Knife & Duct Tape
The shower base will include three layers: an initial layer of concrete, the shower liner, and finally another layer of concrete on which the tile will be installed.
Before you begin, make sure your project site is clean and free of debris. Then, cover the shower floor with tarpaper. The tarpaper acts as a moisture barrier between the layer of concrete and the subfloor.
Lay the tarpaper flat on the floor and, using a level and utility knife, cut the tarpaper to the necessary size.
Measure and cut out a hole for the drain pipe. Cover the drain base with duct tape to keep it debris-free.
Step 5: Install Slopping Layer of Concrete
Materials & Tools: Concrete Mix, Bucket, Level, Measuring Tape, Pencil, Mixing Drill, Small Shovel & Wood Block
The initial layer of concrete needs to be level with the top of the drain base, but as you move further away from the drain, the floor will rise slightly to form a small slope - which encourages water to flow to the drain rather than pooling in the corners.
To calculate the slope for a drain in the centre of a shower, measure the distance between the subfloor and the top of the drain base, determining the thickness of the concrete layer at the drain. Then measure the distance between the drain base and any one of the shower corners, adding 2cm of slope for every metre of distance.
Here's an example of a slope calculation using actual numbers:
- If the distance from the subfloor to the top of the drain base is 4cm, the concrete layer will be 2.5cm thick at the drain.
- • If the distance between the drain base and a shower corner came out to be 0.5m, for every metre you would need to add 2cm of slope, so the total slope would be 1cm.
- • This means that the layer of concrete needs to be 1cm thicker around the outermost perimeter of the shower base than it is around the drain.
- • Therefore, if the thickness of the concrete layer is 2.5cm around the drain, then it needs to be 3.5cm at the outermost perimeter.
Take the measuring tape, level, and pencil and mark a reference line 3.5cm from the subfloor to serve as a guideline for how thick to make the initial layer of concrete.
Using a mixing drill, combine concrete mix with water in a 20 litre bucket following the manufacturer's instructions.
Using a small shovel, scoop up the concrete mixture on top of the tarpaper, starting with the outermost corners first- the thickest part of the layer - and make your way inward to the drain. Make sure you pack the mixture tight.
Use a wood block to firmly tap the mixture into place, so the top is level with the reference line you drew earlier. Continue packing in the mixture, eliminating as many bumps and grooves in the slope as you can.
Use a level to check the consistency of your slope from all four corners as you work.
Your goal is for the level bubble to be about 5mm off the centre line.
Allow the layer of concrete to cure for a minimum of 24 hours before removing the duct tape from the drain base and proceeding to the next step.
Step 6: Install Shower Pan (Membrane) Liner
Materials & Tools: Shower Pan Liner
The shower pan liner is installed over the layer of cured concrete and should come up approximately 15-20cm on each wall and wrap around the entire shower curb.
Lay the liner flat on the floor, measure, and cut to the necessary dimensions. This part of the process requires quite a bit of moving, shifting, and smoothing the liner on the floor. Fold the corners as neatly as you can.
We recommend drilling small grooves into the walls right by the corners so you can neatly tuck the fold into the slight groove.
Step 7: Attach Liner to Walls
Materials & Tools: Shower Pan Liner, Stapler, Staples, Utility Knife, Silicone Caulk & Caulk Gun
When attaching the liner to the walls, staple at the very top edge of the liner to avoid puncturing it in an area where the water may seep through.
If you staple the liner too low, you risk water escaping through the staple holes and getting trapped underneath, which will lead to mould and corrosion.
Cut out a hole in the liner for the drain base, which is typically around 10cm. Feel for the drain with your fingers, then with your utility knife, carefully poke a hole through the liner right in the centre of the drain and cut out the remainder of the circle. Don't attach the drain's clamping ring just yet.
Pump a thin line of silicone caulk between the liner and the drain base, approximately 1-2cm from the perimeter of the drain. Stick the nozzle of the caulk gun into the cutout you just made and apply the caulk along the circular perimeter. Press the liner down firmly to ensure full contact.
Cut a small "X" over each of the bolts, and push the liner down until the drain bolts are visible. Now attach the clamping ring of the drain, using a socket wrench to tighten the bolts until they're snug - just not too snug or you'll risk snapping the plastic clamping ring.
Be sure to clean up any caulk or other debris that may have accidentally gotten into the weep holes (the teeny-tiny holes between the bolts). In the off-chance water does leak through all the way down to this level, the slope of the concrete will encourage the water to trickle down the weep holes, where it will flow into the drain.
Step 8: Install Cement Boards
Materials & Tools: Cement (HardieBacker) Boards, Cement Board Screws, Hammer Drill, Pencil, Level, Utility Knife, Measuring Tape & Hammer
Using a hammer drill, attach cement boards to the shower wall studs and ceiling with special, corrosion-resistant cement board screws.
If you need to cut the boards, lay it flat on the floor and measure and mark your cut line using a pencil and any straight edge, such as a level. Then use a utility knife to etch a groove along the surface of your cut line, which you may need to go over a few times. Snap the board apart along the scored line.
To accommodate the showerhead and faucet, etch around the perimeter of the cutout and break out with a hammer.
Step 9: Tape Cement Board Seams and Cover with Thinset
Materials & Tools: Fibreglass Tape, Notched Trowel, Thinset, Bucket, Mixing Drill, Safety Goggles & Respirator Mask
After you've covered the ceiling and all the walls with cement boards, tape over the seams using fibreglass tape.
Be sure to put on a respirator mask and safety goggles when working with dry thinset.
Combine water and thinset in a 20 litre bucket, following the specific manufacturer's instructions for the correct ratio. With a mixing drill on low speed, mix the water and thinset for 3 minutes. The consistency of the mixture should be like peanut butter - thick enough so that when you pick some up on your notched trowel, it doesn't immediately slide back into the bucket.
Let the mixture sit for about 5 minutes, then mix again for another 2-3 minutes until the mixture is a smooth, lump-free paste.
Using your notched trowel, cover each length of tape with a thin layer of thinset.
Step 10: Install Second Layer of Concrete
Materials & Tools: Concrete Mix, Measuring Tape, Pencil, Level, Bucket, Mixing Drill, Wood Block & 20-Grit Concrete Rub Brick
The top layer of concrete is the surface where your shower tile will finally be installed. If you haven't already, screw in the drain barrel to a height of about 3cm and cover the drain with duct tape to protect it from debris.
The very top surface of the assembled drain will need to be level with the shower floor tile once installed. A 3cm distance between the liner and the top of the drain barrel doesn't necessarily mean that the layer of concrete needs to be 3cm thick, because you need to take into account the height of your tile.
To determine how thick to lay the concrete, measure the thickness of your tile and subtract that number from the distance between the liner and the top of the drain barrel. Whatever number you end up with is how thick the concrete layer should be.
Now, onto the slope. Because the bottom layer of concrete already has a slope, you can install this second layer of concrete with the same thickness throughout, and it will still be at a slope, assuming your first layer was correctly installed. However, since there's really no way to measure the thickness of the concrete as you're applying it, you will still need to mark a reference line on the walls to guide the installation.
Use a level to draw a straight line to indicate how thick the top mud bed will need to be around the perimeter of the shower. As with the first layer of concrete, follow package instructions to create the concrete mixture and begin applying in the outside perimeter, moving inwards toward the drain. Use a level to check the consistency of the slope from all four corners as you work. Again, your goal is for the bubble to be about a quarter off the centre line.
As the concrete starts to harden. you may notice some bumps or uneven spots in the concrete. Use a 20-grit concrete rub brick to sand down and remove these imperfections. Leave the concrete to cure for a minimum of 24 hours.
Step 11: Apply Waterproofing Barrier
Materials & Tools: Waterproofing Barrier, Paint Roller, Covers & Paint Brush
Next, you'll need to apply a waterproofing barrier to the walls and ceiling. Whichever shower waterproofing product you decide to use, the application is fairly simple. Apply it to the walls with a paint roller, as if you're painting the surface.
Then use a paint brush to work it into the corners around shower nooks and other crevices.
Smooth out any clumps and bumps along the way, because the mixture dries exactly as it's applied. Allow it to cure for a minimum of 24 hours.
Step 12: Apply Thinset to Shower Stall Floor
Materials & Tools: Notched Trowel, Thinset, Bucket, Mixing Drill, Safety Goggles & Respirator Mask
Apply an even layer of thinset to the floor using the smooth side of the notched trowel.
Apply more as needed, dragging the trowel in the same direction.
Then, holding the notched side of the trowel at about a 45-degree angle, comb it atop the layer of thinset to create grooves. Be sure to work in small sections when laying your shower tile, as the thinset will dry quickly.
Step 13: Install Shower Tile
Materials & Tools: Tile, Tile Trim, Rubber Float, Thinset & Notched Trowel
When installing shower tile, don't be afraid to slide the sheet of tile around and adjust the seams.
Use a rubber float to ensure full contact between each shower tile and the thinset.
Plan out your tile installation so you use only full tiles at the front of the shower. You don't want unevenly cut half-tiles in such a high-visibility spot.
When installing trim, it's easier to apply the thinset directly onto the trim using the notched trowel.
Make ridges with the notched side of the trowel as best as you can, then adhere the trim to the wall.
Step 14: Cut Shower Tile as Necessary
Materials & Tools: Tile, Tile Nippers
Use tile nippers to snap your shower tiles into half tiles, ¾ tiles and ¼ tiles and separate them out to be applied in the necessary spots around wall corners and edges.
Step 15: Remove Excess Thinset
Materials & Tools: Grout Removing Tool
If any thinset oozes up into the grout lines, try to clean it as you work. In the event that you fail to do so, simply use a small screwdriver, or anything else fairly thin and sharp that you have on hand, to remove the dried mortar from the grout lines. Don't wait too long to do this, or you may end up having to take more drastic measures.
Allow the tile to set for 24 to 48 hours. If your timeline allows for it, a longer drying time is best.
Step 16: Grout the Joints
Materials & Tools: Grout, Bucket, Mixing Drill, Margin Trowel, Rubber Float
Before you begin, be sure the tile is entirely clean and free of debris.
Just like you did with thinset, prepare the grout in small batches so that it can be applied within a half-hour to prevent it from drying out. Using the mixing drill, combine the appropriate amount of grout with water in a separate bucket. Mix on the lowest setting for 3 to 5 minutes, then let it sit for about 5 minutes. Mix for an additional 1 to 2 minutes before applying.
Using a margin trowel, scoop up the grout onto a rubber float and apply it to the wall, sliding across and making sure the mixture fills every groove and crevice.
Watch for little bubbles - an indication that air is trapped underneath. Simply keep smoothing over and over these spots until you've ironed out all air bubbles.
Step 17: Wipe Off Excess Grout
Materials & Tools: Sponge, Clean Cloth, Haze Remover
Let the grout cure for at least 15 minutes before using a damp sponge to clean the excess grout that has accumulated on the tile surface.
Be careful not to get the grout too wet or you risk weakening the bond. Wipe in a way that doesn't pull the still-fresh grout out of the grooves. For shower tile we found that wiping in a semi-circular motion is the best method. If you're noticing that far too much grout is staying on the sponge, give it another five or ten minutes to set before wiping. After another 30 minutes, use a microfibre cloth to buff away the slight film of grout that formed on the tile surface.
Allow three full days for the grout to cure completely.
If you still notice a slight haze on the surface, you have the option of using a haze remover to remove the last remains of the grainy texture. Test a small, inconspicuous area first, as the harsh chemicals in the haze remover can sometimes remove glaze from tile surfaces, leaving glossy tiles with a matte finish.
If you opt for haze remover, wash the floors thoroughly afterwards and allow to completely air dry before sealing.
Step 18: Apply Sealer
Materials & Tools: Sealer, Sealer Applicator Tool, Clean Cloth
The purpose of the sealer is to prevent mould, dirt and discoluoration from ruining your tiles and grout. Be sure to purchase sealer that is intended for use on both tiles and grout. Make sure all of the surfaces you're about to seal are clean. If you've taken the time to rinse the tiles with water, allow it to dry completely before applying sealer.
Use a special sealer application tool to dip into the sealer and apply it liberally to the tiles, paying extra attention to the grout, which is the part that tends to become discoloured and mouldy over time. Allow at least 15 minutes for the sealer to completely penetrate the grout.
Step 19: Wipe Away Excess Sealer
Materials & Tools: Clean Cloth
Wipe away any excess sealer from the tiles with a clean cloth. Allow 24-48 hours for the sealer to cure completely.
Tip: For more home renovation tips and tricks, check out:
- A Step-by-Step Guide on How to Tile a Bathroom Floor
- 11 Ways to Jazz Up Your Shower Tiles
- Your Go-To Guide to Peel and Stick Backsplash
