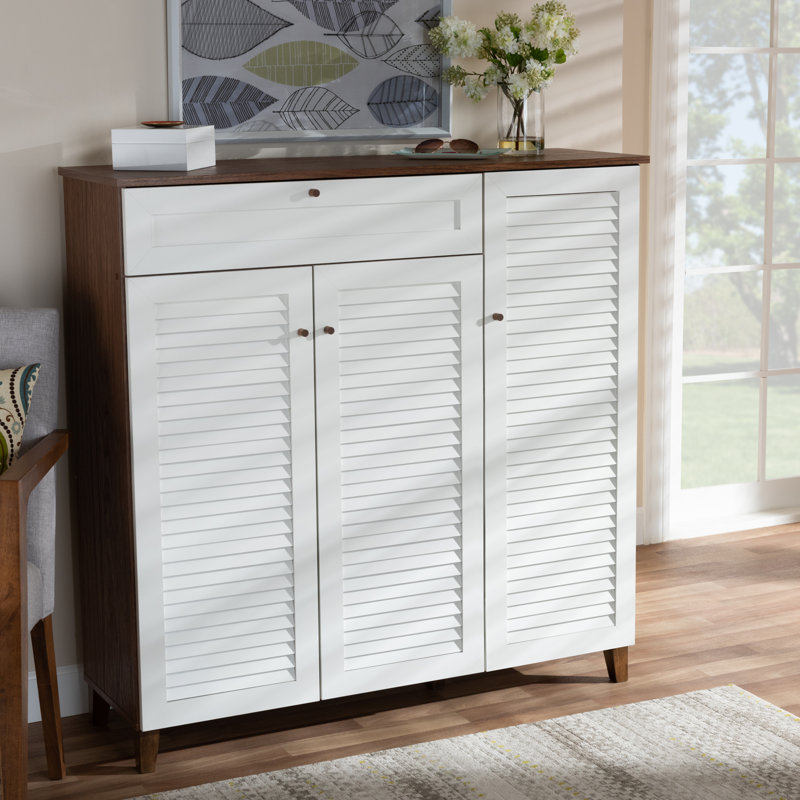
Assembly Required

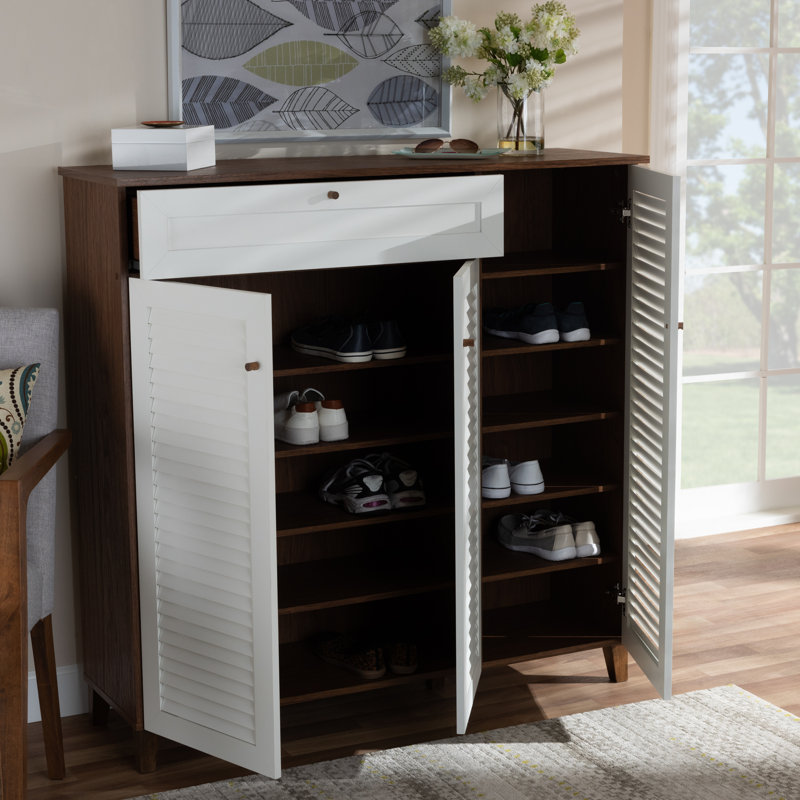
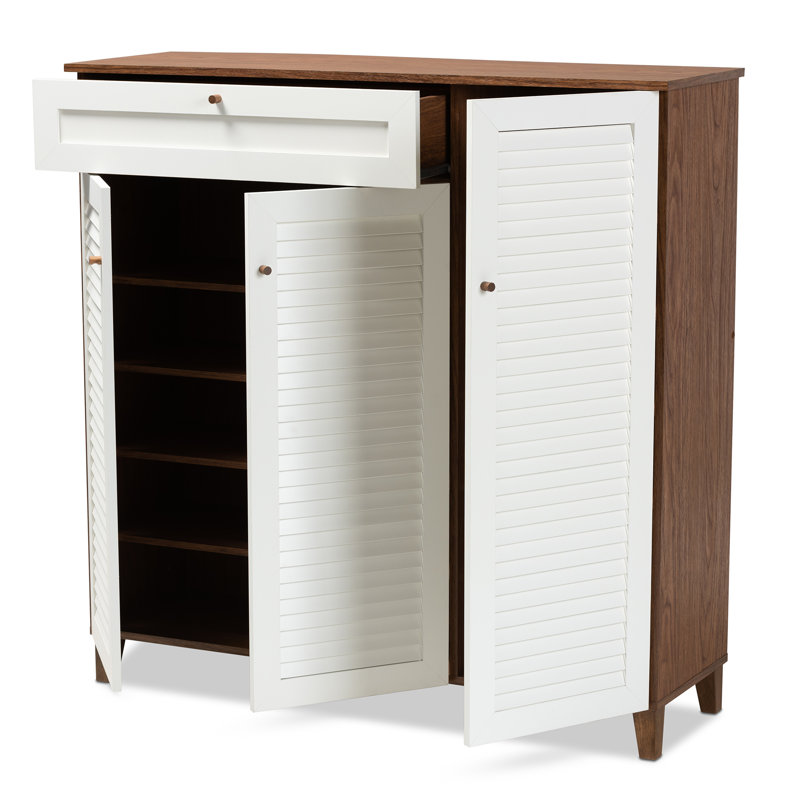
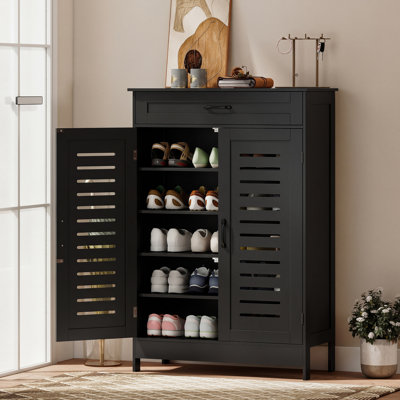
Number of Pairs: 21

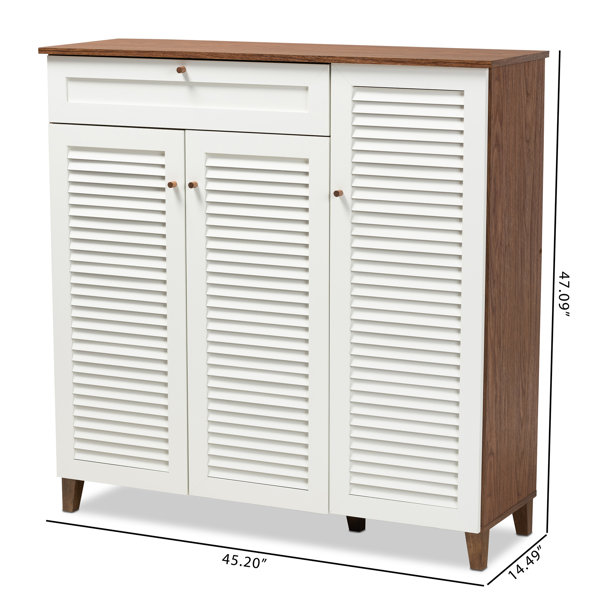
Overall Width: 114.81 cm

Mounting / Installation Required
About This Product
What's Included?

Earn {RICH_TEXT_POTENTIAL_REWARDS} in rewards today, plus free standard delivery² on future purchases & more after you join.
£53/mo. at 0% APR for 6 mos.
Rated 4.5 out of 5 stars
AI-generated from customer reviews
Showing 1-5 of 37 reviews
Rated 5 out of 5 stars
Better than expected! Is it made of manufactured wood? yes. Does it weigh 100 pounds? yes. Do I love it anyway? YES! Highlights: *Arrived without damage. (except one tiny mar in the veneer on the drawer, see 3rd photo) *Took 4 hours to assemble (I'm a bit slow and methodical, due to previous experience screwing up these kinds of things!) *Easily fit 21 pairs of shoes *Drawer and doors lined up perfectly *Two holes were drilled in the wrong spot, off by 1/32", but didn't affect overall assembly Here are some tips regarding the assembly: 1. Before getting started, prepare a large, flat, cushioned workspace like an area rug 2. Unpack the pieces and dust them before assembly (mine was coated in dust and it's easier to do before the hardware goes on) 3. Identify and label the bags of hardware 4. Notes for a few key steps: -Step 1: This is just showing you adding the wooden pegs, not assembling! -Step 3: Not all the holes are shown. You use the 2nd of 4 holes on the wheel side. Put screws on both sides even tho that's not shown in the drawing. -Step 5: The whole connecting D and C was poorly aligned, so look carefully when assembling these. -Step 9: Add felt cushions to feet (not included) at this point. Then move to final locations because it starts getting heavy -Step 10: Don't be temped to add the cute knobs before the hinges. They prevent you from being able to lay the door down flat. -Step 11: The drawer had some quality issues. The hole in Q to attach to R was off by about 1/32". Don't force it! Complete the other drawer steps and THEN just drive the wood screw into R (it's soft enough) so that the drawer will be square. One of the large holes for a #2 (minifix) was drilled in the wrong spot so the hardware didn't fit properly (see photo) -Step 13: I found it easer to attach the hinges with some of the shelves out. You can still carefully slide them in with the doors on. -Step 14: IMPORTANT! The hinges have TWO adjuster screws (one for L/R and one for F/B) and I had to use them both to make the doors close without hitting each other or the drawer.
Rated 3 out of 5 stars
Overall it looks good, but the left two doors are too close so that they cannot close properly.
Rated 5 out of 5 stars
Huge cabinet! Took me three hours to build but it was my first time and I did it! Very clear instructions. Nice looking - exactly as pictured. Can be secured to a wall.
Rated 3 out of 5 stars
Everything is good but the screws quality isn’t good so I wasn’t able to screw the door properly. The door isn’t closing right.
Rated 4 out of 5 stars
One slat piece fell upon delivery, but we managed to put it back, not a big deal!
Rated 4.7 out of 5 stars150 total votes