How to Perfectly Hang Pictures and Wall Art
Get it right the first time with these three easy steps.
Whether you're hanging a collection or one statement piece of art, this guide will teach you how to hang a picture right – the first time.
How to Hang a Picture: Step-by-Step
Step 1: Best Placement Tips
Determine where you want your wall art to live. We’ve narrowed down some popular options:
At Eye Level
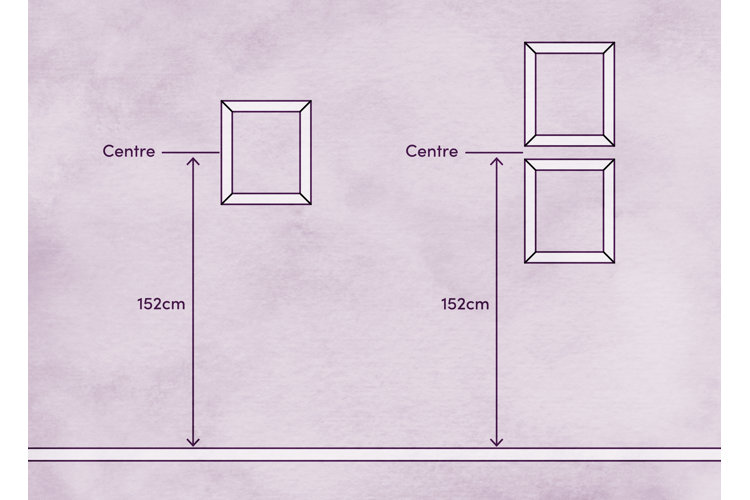
We recommend hanging a picture at eye level. The average person’s line of sight is 150cm off of the ground. This is where you want the centre of your picture to sit.
Above a Sofa
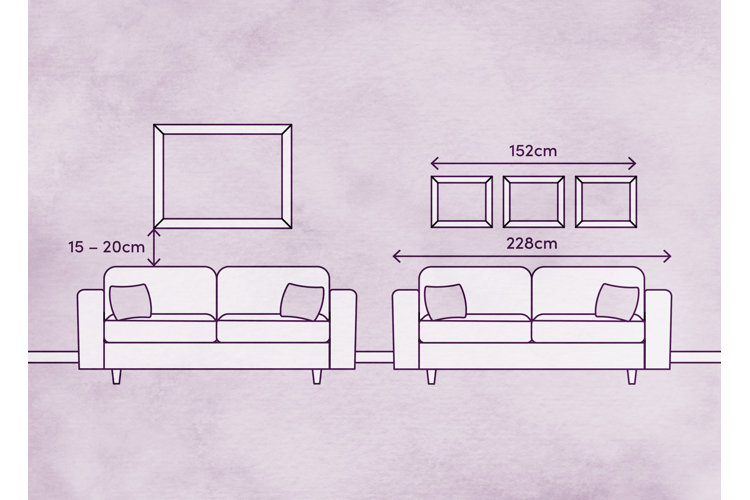
Leave at least 15 – 20cm inches of space between the top of the sofa and the bottom of the picture. To keep the art proportionate to the sofa, its width should span no more than ⅔ of your sofa’s total length.
Above a Fireplace
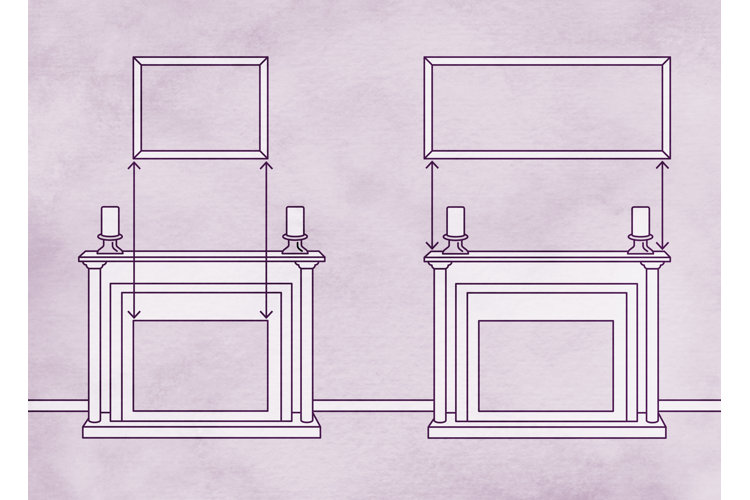
Wall art looks best when its width is between the length of the fireplace opening and the length of the mantel.
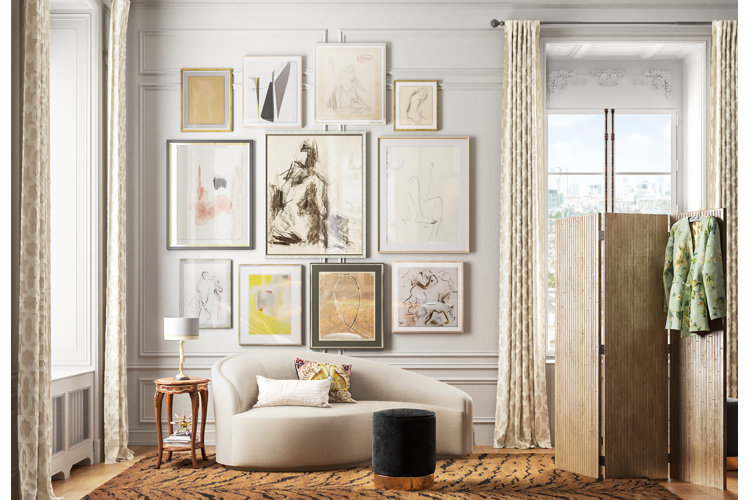
In a Gallery
Making a gallery with more than one picture? You can opt for a uniform look with the same size pictures placed equidistant from each other. You can also try a more creative approach by placing pictures of all different sizes together. For the latter, envision the placement of all the smaller prints as one larger picture. This will help your eye see any inconsistencies or gaps.
Start with the largest print and build the smaller prints around it. With both options, allow at least 2" of space between each piece of art and aim to have your gallery’s center height to be roughly 150cm from the ground. Having trouble creating cohesiveness? Try uniform frames, all monochromatic prints or a gallery of solely architectural elements.
Tip: Cut butcher paper to reflect the sizes of each picture in your gallery. Use these to plan out your gallery wall by hanging them with painter’s tape. Play around with them until you’ve mapped out your gallery.
Step 2: Hanging Method
There are several ways to hang a picture. No matter which method you choose, use caution so as not to rip the paint off the wall. If your picture comes with a specified hanging method, follow the provided installation instructions. Otherwise, common methods are nails, hooks, and hanging strips.
For small pictures, one hanger will usually do the trick – but the larger and heavier it is, the more hangers it will need. Make sure your hanger sits several inches below the top of the picture. Try hanging strips for the lightest picture frames or canvas prints.
Tip: If you're worried about your drywall and hanging heavy pictures, use an anchor along with your nail or hook to make sure it has the necessary support.
Step 3: Time to Hang
Step 1: Use painter’s tape where you determined placement for your picture. If hanging more than one picture, be sure to use the tape to highlight where all of them will be hung – it’ll help you spot any discrepancies.
Step 2: Mark where the nail/hook will sit on the wall. To account for the height difference between where the hanger sits and the top of your picture, measure the length from the hanger to the top of the frame. If you're hanging a canvas or a frame without hardware, measure from the top edge of the picture to the lip of the frame (where the nail will rest).
Step 3: Attach your hanging method to the wall. For hanging strips, attach them to the picture frame before the wall. If using more than one strip, make sure they are all facing the same direction for easy removal.
Step 4: Hang your picture. Finish up by checking the placement with a level and nudging a side up or down as needed. What looks right up close may look slanted from a distance..
Tip: Enjoyed this article? Then why not also check out:
- This is How to Measure and Hang Wall Art Like a Pro
- Ask the Experts: How to Create a Feature Wall
- 9 Ways to Decorate a Large Wall
