Mounting a TV? Let our Experts Guide You
For perfect viewing.
Mounting your flat screen TV onto a wall, ceiling or otherwise is an easy way to elevate your entertainment experience. Check out our guide for everything you need to know about how to mount a TV, from how high to mount your TV to how much mounting costs.
Types of TV Mounts
The TV mounting process will be different depending on your space and mount type, so it's important to understand what kind of mount you have. If you haven't bought a TV mount yet, learn about the various options below.
Low-Profile Wall Mount
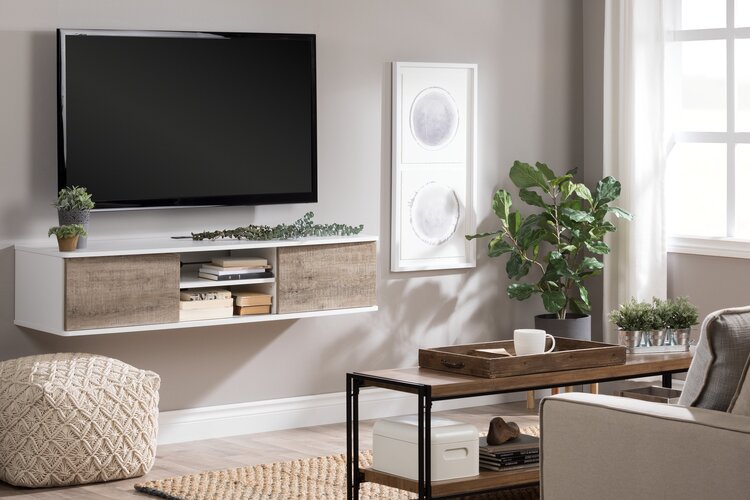
Also known as a flat or flush-mount bracket, this mount type is a simple metal frame that secures your TV to the wall like a picture frame. A low-profile mounted TV sits between 1” and 2” from the wall. This style is fixed, meaning it doesn't pan, tilt or rotate. It is one of the easiest wall mounts to install and consists of a wall-attaching bracket and two upright posts, or one flat plate that attaches to the back of your TV. Though this can make managing rear cables difficult, these mounts are perfect if you don’t want your TV to take up too much space.
Tilt Wall Mount
These are most commonly used to install a TV above a fireplace. These mounts look and install very similarly to low-profile mounts, except that the two upright posts can be adjusted to angle a TV up or down – up to 15 degrees. Tilt mounts typically cost more than fixed mounts. The tilt provides more room for installing cables in the back of the TV and will help fight glare in a bright room.
Swivel Wall Mount
A swivel wall mount is great for mounting a TV in a corner or for rooms that require specific seating arrangements. Also called full-motion and articulating mounts, swivel mounts can tilt from side to side as well as up and down. In most cases, a swivel wall mount has a bracket or flat, butterfly-shaped panel that attaches to the back of your TV. Typical swivel mounts angle up and down the same way as tilt mounts, but also pivot on a jointed arm that can be extended and collapsed, depending on how far you’d like your TV to reach off of the wall. These mounts tend to be more expensive and harder to install than fixed and tilt mounts.
Ceiling Mount
Ceiling mounts attach your TV to your ceiling. These mounts consist of a ceiling attachment, a long, usually fixed arm that holds the TV from the ceiling and a bracket that attaches to the back of the TV. These mounts are the most expensive available and tend to be more difficult to install than wall mounts as you’ll need to access the ceiling. They can also be more dangerous if installed incorrectly, so it’s essential to be extra careful working with ceiling-mounted TVs.
Pole Mount
Pole mounts attach your flat screen TV to a pole. Some TV pole mounts come with an adjustable and rotating clasp, which attaches flat panel screens to various pole sizes.
Floor Stand Mount
Floor stands offer a way to life your TV from the floor without the need for drilling or attaching to a wall. With this type of mount, it's best to make sure that your stand is bigger than your TV to enable better support. Some floor stands come with additional shelves and storage.
Tip: When choosing a TV mount, keep in mind the size, weight and model of your TV. Some mounts are better optimised for certain sizes of TVs than others. Often, mounts will be made to match a specific model of flat screen TV.
Additional Features to Consider
Outdoor Use: If you want to mount your TV outside, be sure to choose a mount meant for outdoor use.
Component Shelving: Cable boxes, remotes, and game consoles can hang out with your TV as this wall mount has shelf space built right in.
Motorised: Adjust your TV from the comfort of your sofa.
Tip: You may have heard that mounting a TV above a fireplace is a no-no because heat and smoke can damage your TV and the viewing angle won’t be great. This might be the case with older fireplaces, but as long as yours doesn’t allow too much heat or smoke out its front, all you’ll need to mount your TV over your fireplace is a tilt mount. It’ll solve that neck-craning problem right away.
#What You’ll Need:
TV mount installation should take you about one to two hours. Before installing your mount, it is important to read through your specific TV and mount instructions to confirm you have all the appropriate tools and supplies. Here’s a list of tools that should help you get the job done:
- Mount
- TV
- Power drill
- Screws (usually included with mount)
- Hammer
- Nail
- Level
- Electronic stud finder
- Painter's tape or sticky notes
- A friend to help you lift the mount and TV
How to Install Your TV Mount
(Applies to wall mounts)
Step 1: Find the Location of Your TV
Have someone hold your TV (or a TV-sized piece of cardboard) against the wall in different places and at different heights while you move around the room. You’ll want to check how the screen looks when standing and when sitting down. Use a measuring tape to find the distance between your TV and your viewers. The distance should be slightly smaller than two times the diagonal size of your TV.
Knowing exactly how high to mount a TV depends on the height of your seating arrangements and your viewers. Typically, the distance from the floor to the centre of the TV, should be 56” for a 42” TV, 61” for a 55” TV, 65” for a 65” TV and 67” for a 70” TV, but it depends on how tall your seating options are. A comfortable viewing angle is anywhere between 10 and 30 degrees above eye level.
It’s also good to consider how much glare a room might have as well as how many outlets are accessible nearby.
Step 2: Locate and Mark Studs
Once you’ve chosen a spot on your wall or ceiling, use your electric stud finder to locate a stud or pair of studs behind your wall. Find the centre, or centres, and mark their locations. Check that you’ve found a stud by gently hammering a nail into the wall. To mount a TV to drywall, brick, or metal without studs, you’ll need wall mounting toggles or anchors, which hold weight in a way that
doesn’t put stress on your wall. Be careful: If you don’t mount your TV properly, you can damage your wall and your TV.
Step 3: Mark and Drill Pilot Holes
Hold your mount to the wall above the studs, use a level to ensure that it is straight up and down, and mark where you’ll need to drill pilot holes. (If using a ceiling mount, the level won’t be needed) Then, drill your pilot holes.
Step 4: Attach Your Mount
Put your mount back in position, ensuring once again that it is level and lined up with the pilot holes you made, and screw it into the wall or ceiling using your drill.
Step 5: Attach the Mounting Bracket or Panel to Your TV
On your TV, locate where the attaching screws are meant to go and screw your mount in using those holes. With tilt, swivel or ceiling mounts you may have to do this up against the wall.
Step 6: Attach Your TV to the Wall
If not already attached, connect your TV’s mounting bracket or panel to the wall mount. Make sure to read your mount’s instructions to do this properly. To remove your TV from the mount, just carefully unscrew it from the mounting panel or wall.
Tip: For more home entertainment tips and tricks, check out:
- How to Hide TV Wires and Cables
- The Best Stands to Display Your TV and Media Set Up
- Why Ergonomic Seating is a Worthy Investment
