Master the Art of The Gallery Wall
Picture perfect.
Gallery walls are everywhere. From Insta-worthy walls filled with prints and posters to subtle, small but beautifully curated home galleries, gallery walls are the ideal way to make a bold statement about your personality. However, they're not always so easy to arrange. That's why our experts are sharing their simple steps to creating a gallery wall perfect for your home.
Step 1: Gather the Art
Grab pieces from around your home, ones stored away in the attic, or art you've collected specifically for this purpose. Take stock of what you have and consider these factors:
Colour Scheme: For beginners, select only wall art that features colours in a certain palette. This ensures the grouping feels cohesive, not scattered.
Frame Type: A foolproof way to unite a gallery wall is by framing everything in the same style of frame. Whether it's ornate black or sleek white, this common characteristic brings the whole look together.
Size: A well-balanced gallery wall contains art of all sizes. Be sure you have a good mix. Pick two or three larger pieces and fill in the rest with smaller pieces.
Tip: Think outside the frame. Include sculptural wall décor, canvas art and even eye-catching clocks and plates for an eclectic, yet chic, gallery wall.
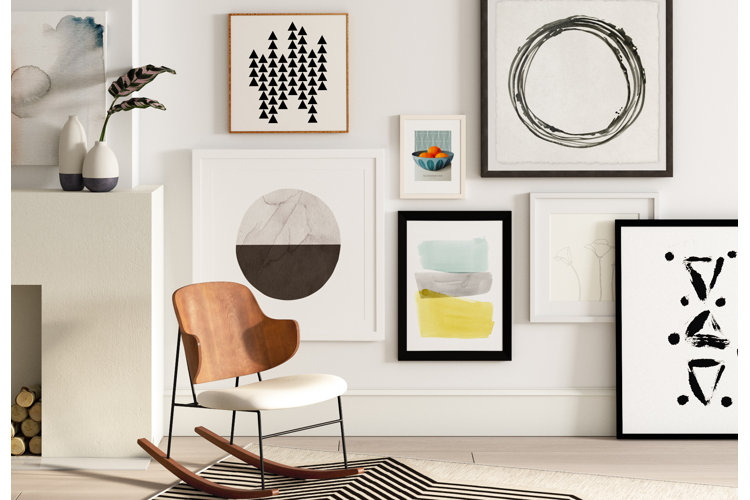
Though this colour palette features bright hues (orange, yellow, purple), they're subdued by lots of black and white mats, frames and within the artwork itself.
Our experts love how neutrals give the eye a place to rest, allowing your gallery wall to be attention-grabbing and not overwhelming.
Step 2: Decide on a Layout
Looking for a sure-fire arrangement trick? Place each frame facedown on a piece of newspaper and trace its edges. Next, cut out each tracing and use painter's tape to adhere them individually to the wall. This will allow the freedom to rearrange your gallery without putting holes in the wall each time you want to shift the look around.
Try these three designer tips to find the optimal layout:
1) Avoid placing any piece of art in the exact center of the grouping.
2) Start with the biggest pieces and work your way down to the smaller ones.
3) Leave at least 5cm of space in between each piece. (Remember this is a general rule and like all rules, it's meant to be broken from time to time)
Arrange the gallery wall around the furniture, rather than around the space. For example, centre a grouping over a sideboard or sofa, even if that means it's not centred on the wall. As you work, take pictures with your phone of each arrangement to help determine which one looks best. Once you've created a setup you like, it's time to get out the toolbox.

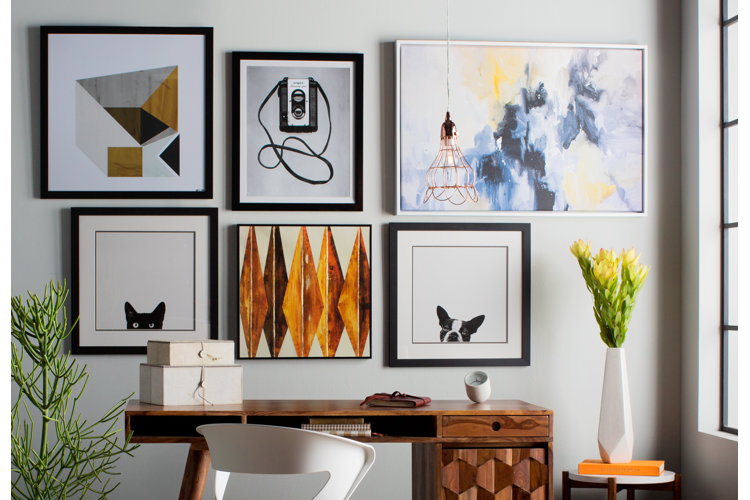
We love how this gallery arrangement sits above the sideboard, connecting the two and creating an organic and cohesive feel.
For an unexpected touch, bring this look into your bedroom over a vanity.
Step 3: Hang it Up
Once you have your wall laid out, go ahead and knock a nail into the wall centre of the top edge of each tracing. Leave your newspaper tracings up until you are ready to replace them with the actual frames. Picture hanging nails work best, but picture hanging strips also work for an apartment or rented home.
Tip: Consider this a work in progress. Nothing has to be perfect the first time around. Feel confident adding and removing anything as time goes on.
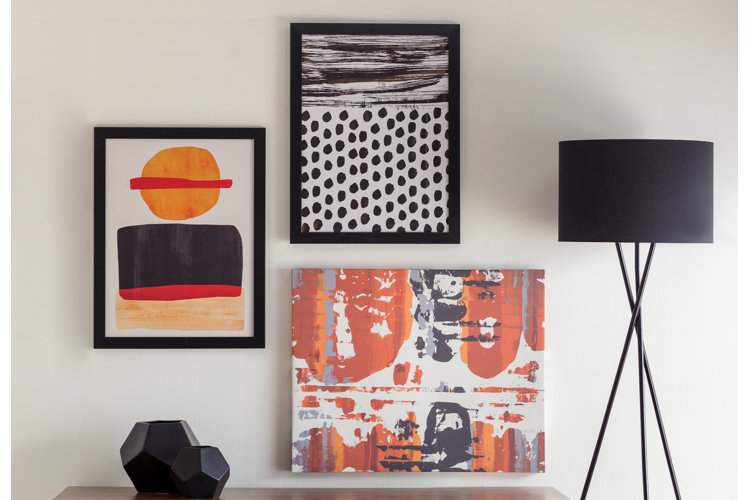
For an eclectic mix, space out pictures according to their size. Bigger pieces get more space in between the next one, while smaller pieces are grouped closer together.
This gives the feeling that the arrangement developed over time and makes it look less like a strict grid.
Tip: Find more inspiration for your gallery wall with:
- Gallery Wall Ideas to Try at Home
- How to Perfectly Hang Pictures and Wall Art
- Ask the Experts: How to Create a Feature Wall
