DIY Christmas Table Decorations to Keep You Merry and Bright
A personalised approach to this year's Christmas table setting.
Set the tone for a memorable Christmas by adding your own festive DIY table decor. As part of Wayfair's 'Christmas Your Way' campaign, we're embracing all things artisan by collaborating once again with DIY blogger, Fall for DIY to deliver two homemade Christmas table setting ideas and Christmas decorations.
Christmas DIY Table Decor
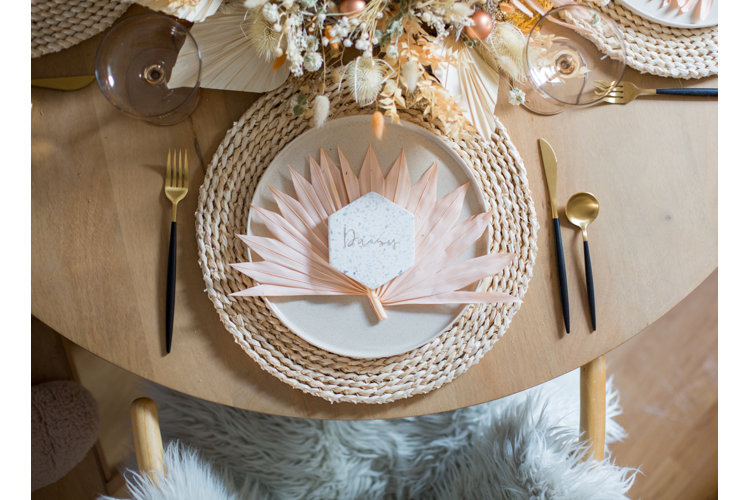
DIY Personalised Coaster Place Settings
What You'll Need:
Terrazzo coasters
Vinyl name - cut out or order online
Transfer tape
Scraper
Step-by-Step Guide: DIY Personalised Coaster Place Settings
Step 1
Clean the surface of each coaster with warm soapy water and dry with a cloth. Leave for a few minutes until it feels completely dry to the touch.
Step 2
Cut off a small piece of transfer tape which will cover the entire name you have chosen for coaster place setting. Layer this over the vinyl name and press down.
Step 3
Rub over the tape and vinyl using the scraper. Keep in mind that you want to create a strong bond between the tape and the vinyl.
Step 4
Carefully peel back the tape to remove the vinyl from the backing in one piece.
Step 5
Place the backing tape sticky side down onto the coaster ensuring it is positioned in the centre.
Step 6
Use the scraper to rub over the surface of the tape again. This time you want the vinyl to adhere to the coaster.
Step 7
Peel back the transfer tape from one corner. Do this slowly and carefully checking all the vinyl is stuck down onto the coaster as you go. If the vinyl sticks to the tape use the scraper to rub this area again and try peeling a second time.
Step 8
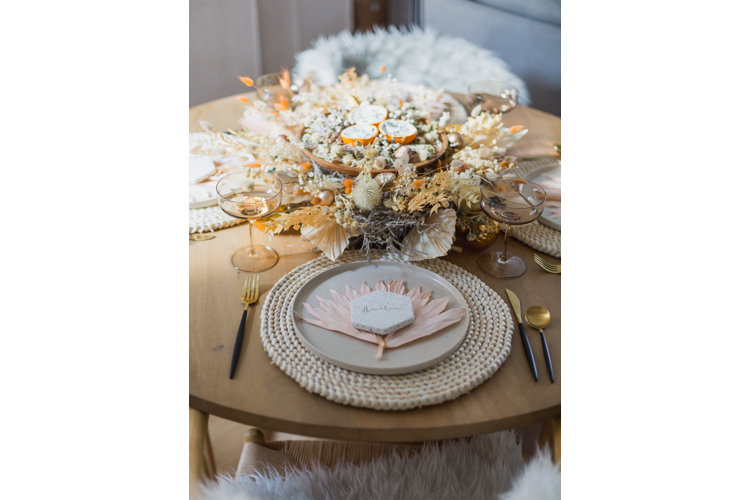
Once the tape is off your place setting is ready. Here the coasters have been styled with some natural dried palm fronds for a boho twist on a festive look.
DIY Orange Peel Scented Natural Candles
What You'll Need
Oranges
Soy wax
Orange extract
Candle wicks
Wick holder
Pyrex glass bowl
Small pan
Rosemary
Step-by-Step Guide: DIY Orange Peel Scented Natural Candles
Step 1
Using a knife slice the orange in half. Cut the flesh away from the peel and scoop it out with a spoon. Take out as much as you can leaving only the peel.
Step 2
Place a small pan filled about a quarter full with water on the heat. In the pan place a heat resistant glass bowl. Melt the soy wax in the bowl over a low heat.
Step 3
Once melted turn the heat off and leave the wax to cool slightly before pouring.
Step 4
Add a few drops of orange essential oil to the wax to create a warm festive scent.
Step 5
Take a wick and dip the metal wick sustainer (the metal at the end of the wick) into the wax. Hold this down on the bottom of the hollowed out orange until the wax is dry and the wick is set in place. If you have a wick holder put it in place now. Otherwise you can use skewers or sticks to hold it in place.
Step 6
Carefully pour the wax into the orange peel. Fill the peel to the top with wax.
Step 7
Pick off a few fresh rosemary leaves and sprinkle them into the surface of the wax. Leave the wax to start setting, then sprinkle a few more so they sit on the surface of the candle.
Step 8
Once the wax is fully set remove the wick holder and trim the wick to around 1 cm.
Step 9
Light the candle and enjoy the warm glow and festive scents!
Images & videos c/o Fall for DIY
Tip: Find more festive ideas and inspiration with Wayfair, read:
- How to Decorate Your Home Scandi Style This Christmas
- How to Put Lights on a Christmas Tree Like a Pro
- How to Hang a Wreath on Your Door Without Damaging It
